Managing Default and Dynamic Memory Data
The Memory tab of the Product properties page enables you to define the layout and contents of the memory data associated with the Product. This data is written to the Sentinel protection keys when an order for a Product is produced, or when a Product is activated using a Sentinel protection key. You might use memory, for example, to migrate existing license data or store homegrown license data, or for usage counters.
Comparison of Default and Dynamic Memory
| Default Memory | Dynamic Memory | |
|---|---|---|
| Description |
Default memory is a legacy data type that is defined per product. |
Dynamic memory is a newer data type that is defined separately in standalone files according to the batch code and then added to a product. This enables you to use the same dynamic memory files in multiple products. |
| Size and file attributes |
You can create a maximum of one read-only memory and one and read-write memory in each product. Read-write and read-only memory are stored in separate files. Each of these files has a fixed file size, which is much smaller than the size available for dynamic memory files*. Each default memory file can contain one or more memory data segments. This lets you separate data, apply offsets, and define specific areas in memory. |
Each file size is customizable, enabling you to optimize the use of available space. The overall space available for dynamic memory files is much larger than the space available for default memory*. Each dynamic memory file can contain read-only, read-write, or write once memory, providing you with more options than default memory. This lets you "mix-and-match" memory files with the same or different "read" attributes. In addition, "write once" memory enables you to convert a read-write file to a read-only file after a single edit. |
| When do you define memory? | You can define default memory when creating or editing a Product. The data in each segment can be loaded from an XML file, created directly in Sentinel LDK-EMS, or set by the order taker when creating an entitlement. |
You define dynamic memory files in advance and then include one or more when creating a product. Data can be defined directly in the dynamic memory file or set by the order taker when creating an entitlement. |
| For best results |
>Consider the size of each segment when determining the data to use. >When multiple segments are used, you must carefully set the length (size in bytes) and offset for each segment to ensure that the segments do not overlap and overwrite each other. |
>Create one memory segment per dynamic memory file. Separating data into distinct dynamic memory files enables Sentinel LDK-EMS to manage the file locations in a product, ensuring that memory files never overlap or overwrite each other. >Include a single piece of data in each dynamic memory file, such as a variable or a constant. >Set the file size to the maximum required for the data in that file. Smaller files generate faster than larger files. NOTE As stated above, using one memory segment per dynamic memory file provides the best results. However, if you decide to include multiple memory segments in a single dynamic memory file, you must: >Ensure that the dynamic memory file size is compatible with all Sentinel keys in use. >Carefully set the length (size in bytes) and offset for each segment in the file to ensure that the segments do not overlap and overwrite each other. |
*For details on the memory file sizes available for the various Sentinel keys, see Sentinel Keys Data Sheet.
TIP When you finish defining the associated Product memory as described in this section, you can continue defining the remaining Product details or save the Product. For details, see Managing Products.
Adding Default Memory to a Product
This section describes how:
>To define a new segment and data in default memory:
>To edit segments and data in default memory:
To define a new segment and data in default memory:
1.Select Catalog > Products.
2.Either select a Product in Draft state from the list of Products or click New Product.
3.Click the Memory tab.
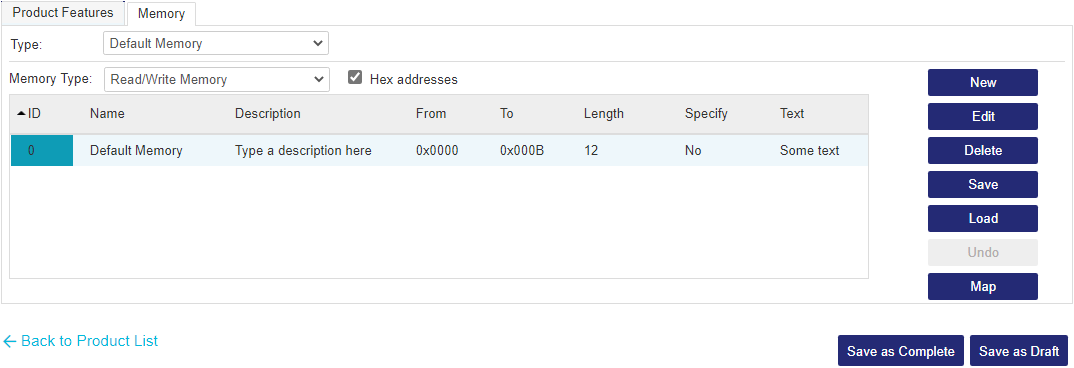
4.In the Type box, select Default Memory.
5.In the Memory Type box, select the required memory type for the new segment:
•Read/Write Memory: Data that can be updated at run-time, for example, value variables for counters, and information retrieved during interaction with the end user.
•Read-Only Memory: Data to be read at run-time, for example, the Product version number, text to be used in a "Welcome" message, and fixed threshold values for counters.
6. If you prefer to use hexadecimal definitions instead of decimal definitions to define offset locations and addresses in memory, select the Hex addresses check box.
7.(Optional) Define a new area in memory, click New. The New Memory Segment dialog box opens.
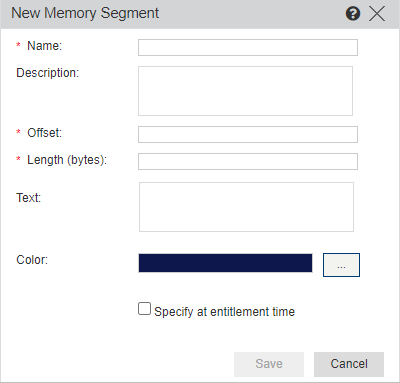
a.Enter a Name (maximum 50 characters) and Description (maximum 250 characters) for the new memory segment.
b. Enter the Offset and Length of the new segment. You can select a Color from the palettes that will help you identify the segment. The Length (bytes) value can be:
–Read/write memory: 1–4032 bytes
–Read-only memory: 1–2048 bytes
NOTE Sentinel HL Pro keys provide 112 bytes each of Read/Write and Read-Only memory.For the latest information on the memory file sizes available for Sentinel keys, see Sentinel Keys Data Sheet.
c.In the Text field, enter the memory data.
NOTE You must exercise caution while entering memory data in this field. Copying and pasting data from Sentinel LDK Toolbox may lead to data modification during the copying process.
d. If you require the memory data for the New Memory Segment to be entered during Entitlement generation, select the Specify at Entitlement time check box.
NOTE When defining memory data for an Unlocked Product, you cannot specify that the data will be entered during Entitlement generation.
e. Click Save. The newly defined area is displayed in the lower section of the Memory tab. The segment addresses are displayed on the left.
To edit segments and data in default memory:
> To edit the offset, size, or color of a memory segment, select the segment and click Edit. Modify as needed and click Save to update the changes.
> To delete a memory segment, select the segment and click Delete. The segment is deleted.
> To save a memory segment as an XML file, select the segment and click Save. The File Download dialog box appears. Save the file to a directory in your system (default file name is memory.xml).
>To load a memory segment from a file, click Load. In the Load Memory File dialog box, click Browse to navigate to the directory containing the saved memory segments, select the required memory segment, and click Load. The selected memory segment is loaded.
NOTE During Product definition, a loaded memory segment overwrites any pre-existing memory in that segment.
> To unload a previously loaded memory segment from a file, select the segment and click the Undo. The memory unloads the last-loaded segment.
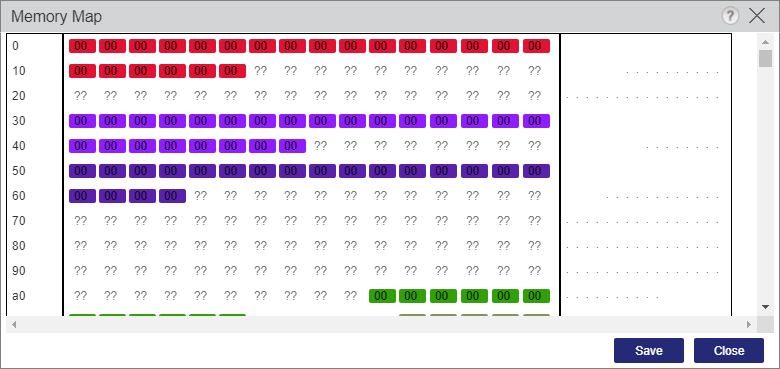
>To display the memory map click Map.
Adding Dynamic Memory to a Product
You can associate an existing dynamic memory file with a product.
To associate and configure dynamic memory in a Product:
1.Prerequisite: Make sure that the required dynamic memory files exist (Catalog > Dynamic Memory). For details on defining dynamic memory files and segments, see Creating Dynamic Memory.
2.Select Catalog > Products.
3.Either select a Product in Draft state from the list of Products or click New Product.
4. Click the Memory tab.
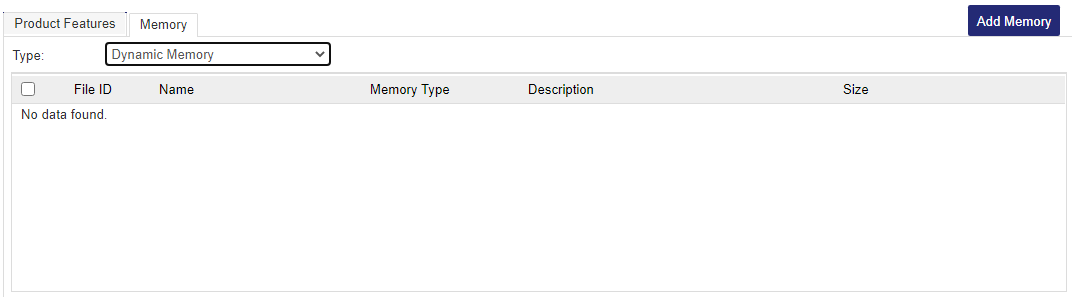
5.In the Type box, select Dynamic Memory.
6.Click Add Memory. The Add Memory Files to Product dialog box opens.
7.Select the check box for the required memory files and click Add Memory. The selected memory files are associated to the Product.
NOTE Each dynamic memory file associated with a single product must have a unique FileID.
8.Click the Configure link corresponding Dynamic Memory file added to configure details. The Memory Segment Details dialog box opens.
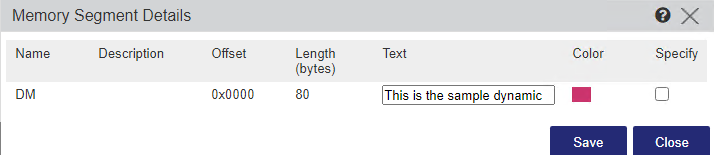
9.Configure details as required.
10.Click Save.
TIP To remove a dynamic memory segment from the Memory tab, select the check box corresponding to it and click Delete Memory.